How it fits together
WearDash has two halves. The watch app renders a configuration and talks to your devices directly; the web editor writes that configuration and sends it to the watch. Nothing is proxied at runtime: once the config is on the watch, your dashboard talks to Home Assistant or your API over your own network.
The configuration is a single YAML file. The visual editor reads and writes it, so you can start by dragging blocks and switch to the code view whenever a hand edit is faster.
Secrets are never part of the config. They are typed in the editor, encrypted in your browser with a key derived from the pairing code, and stored on the watch. Our servers only relay ciphertext.
At first launch
The first time you open WearDash, the watch asks what you want first. Both paths stay open afterwards: a remote can gain screens, and a watch full of screens can still pair a TV.
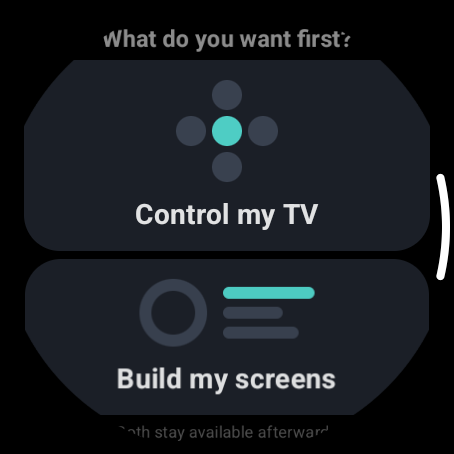
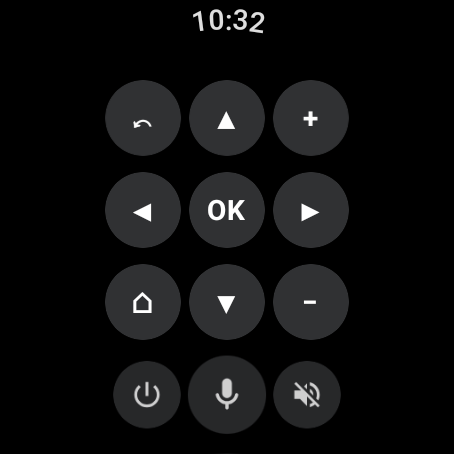
Control my TV
The watch loads a ready-made remote, looks for your Android TV on the Wi-Fi, and asks for the code shown on the TV. Nothing happens on the web: the d-pad, volume and voice work straight away.
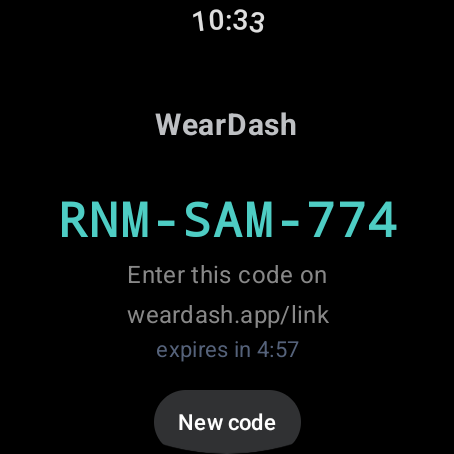
Build my screens
The watch shows a pairing code and waits. Type it in the editor on this site, pick a starting point, then send. This is the path the quick start below follows.
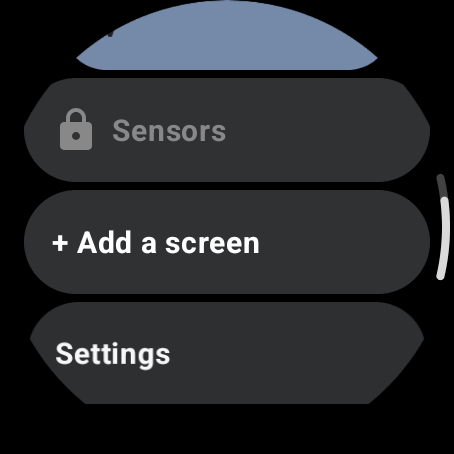
Settings, further down the list
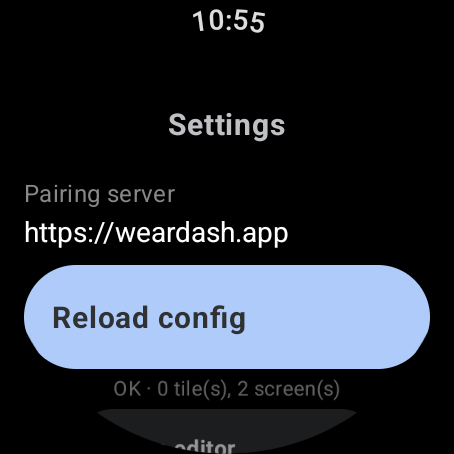
Scroll past your screens on the watch: after “Add a screen” comes Settings. That is where the config reloads, where secrets and connectors live, and where the pairing server is set. Point it at your own instance and nothing else changes: the watch keeps talking to your devices directly.
Quick start
Install WearDash on the watch
Install it from Google Play on a Wear OS 3 or later watch. The app is standalone: no phone app is needed.

Open the editor and pair
On the watch, pick “Build my screens” at first launch, or “Add a screen” later. It shows a nine-character code: type it in the editor on this site to open an encrypted channel.
Open app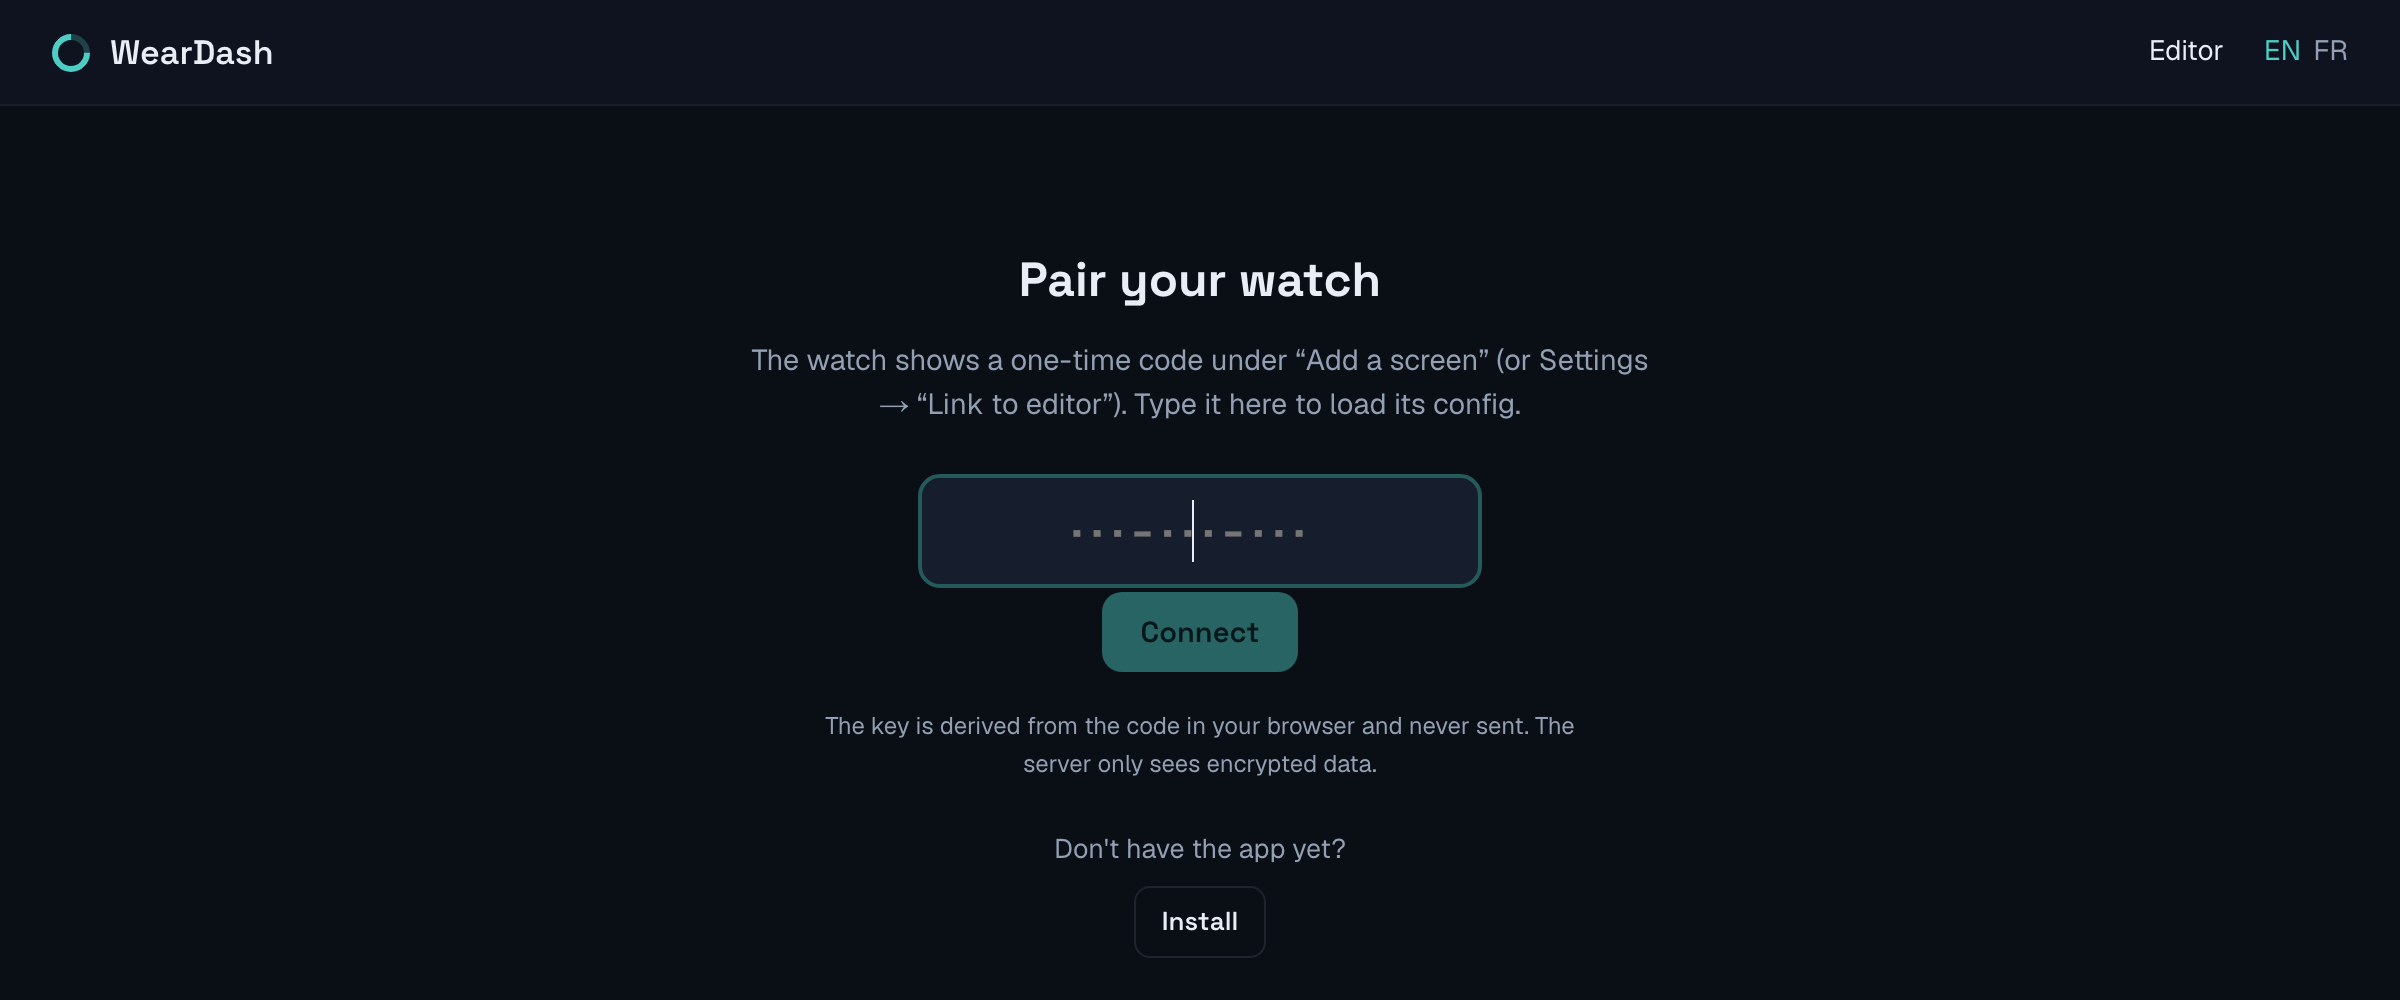
Pick a starting point
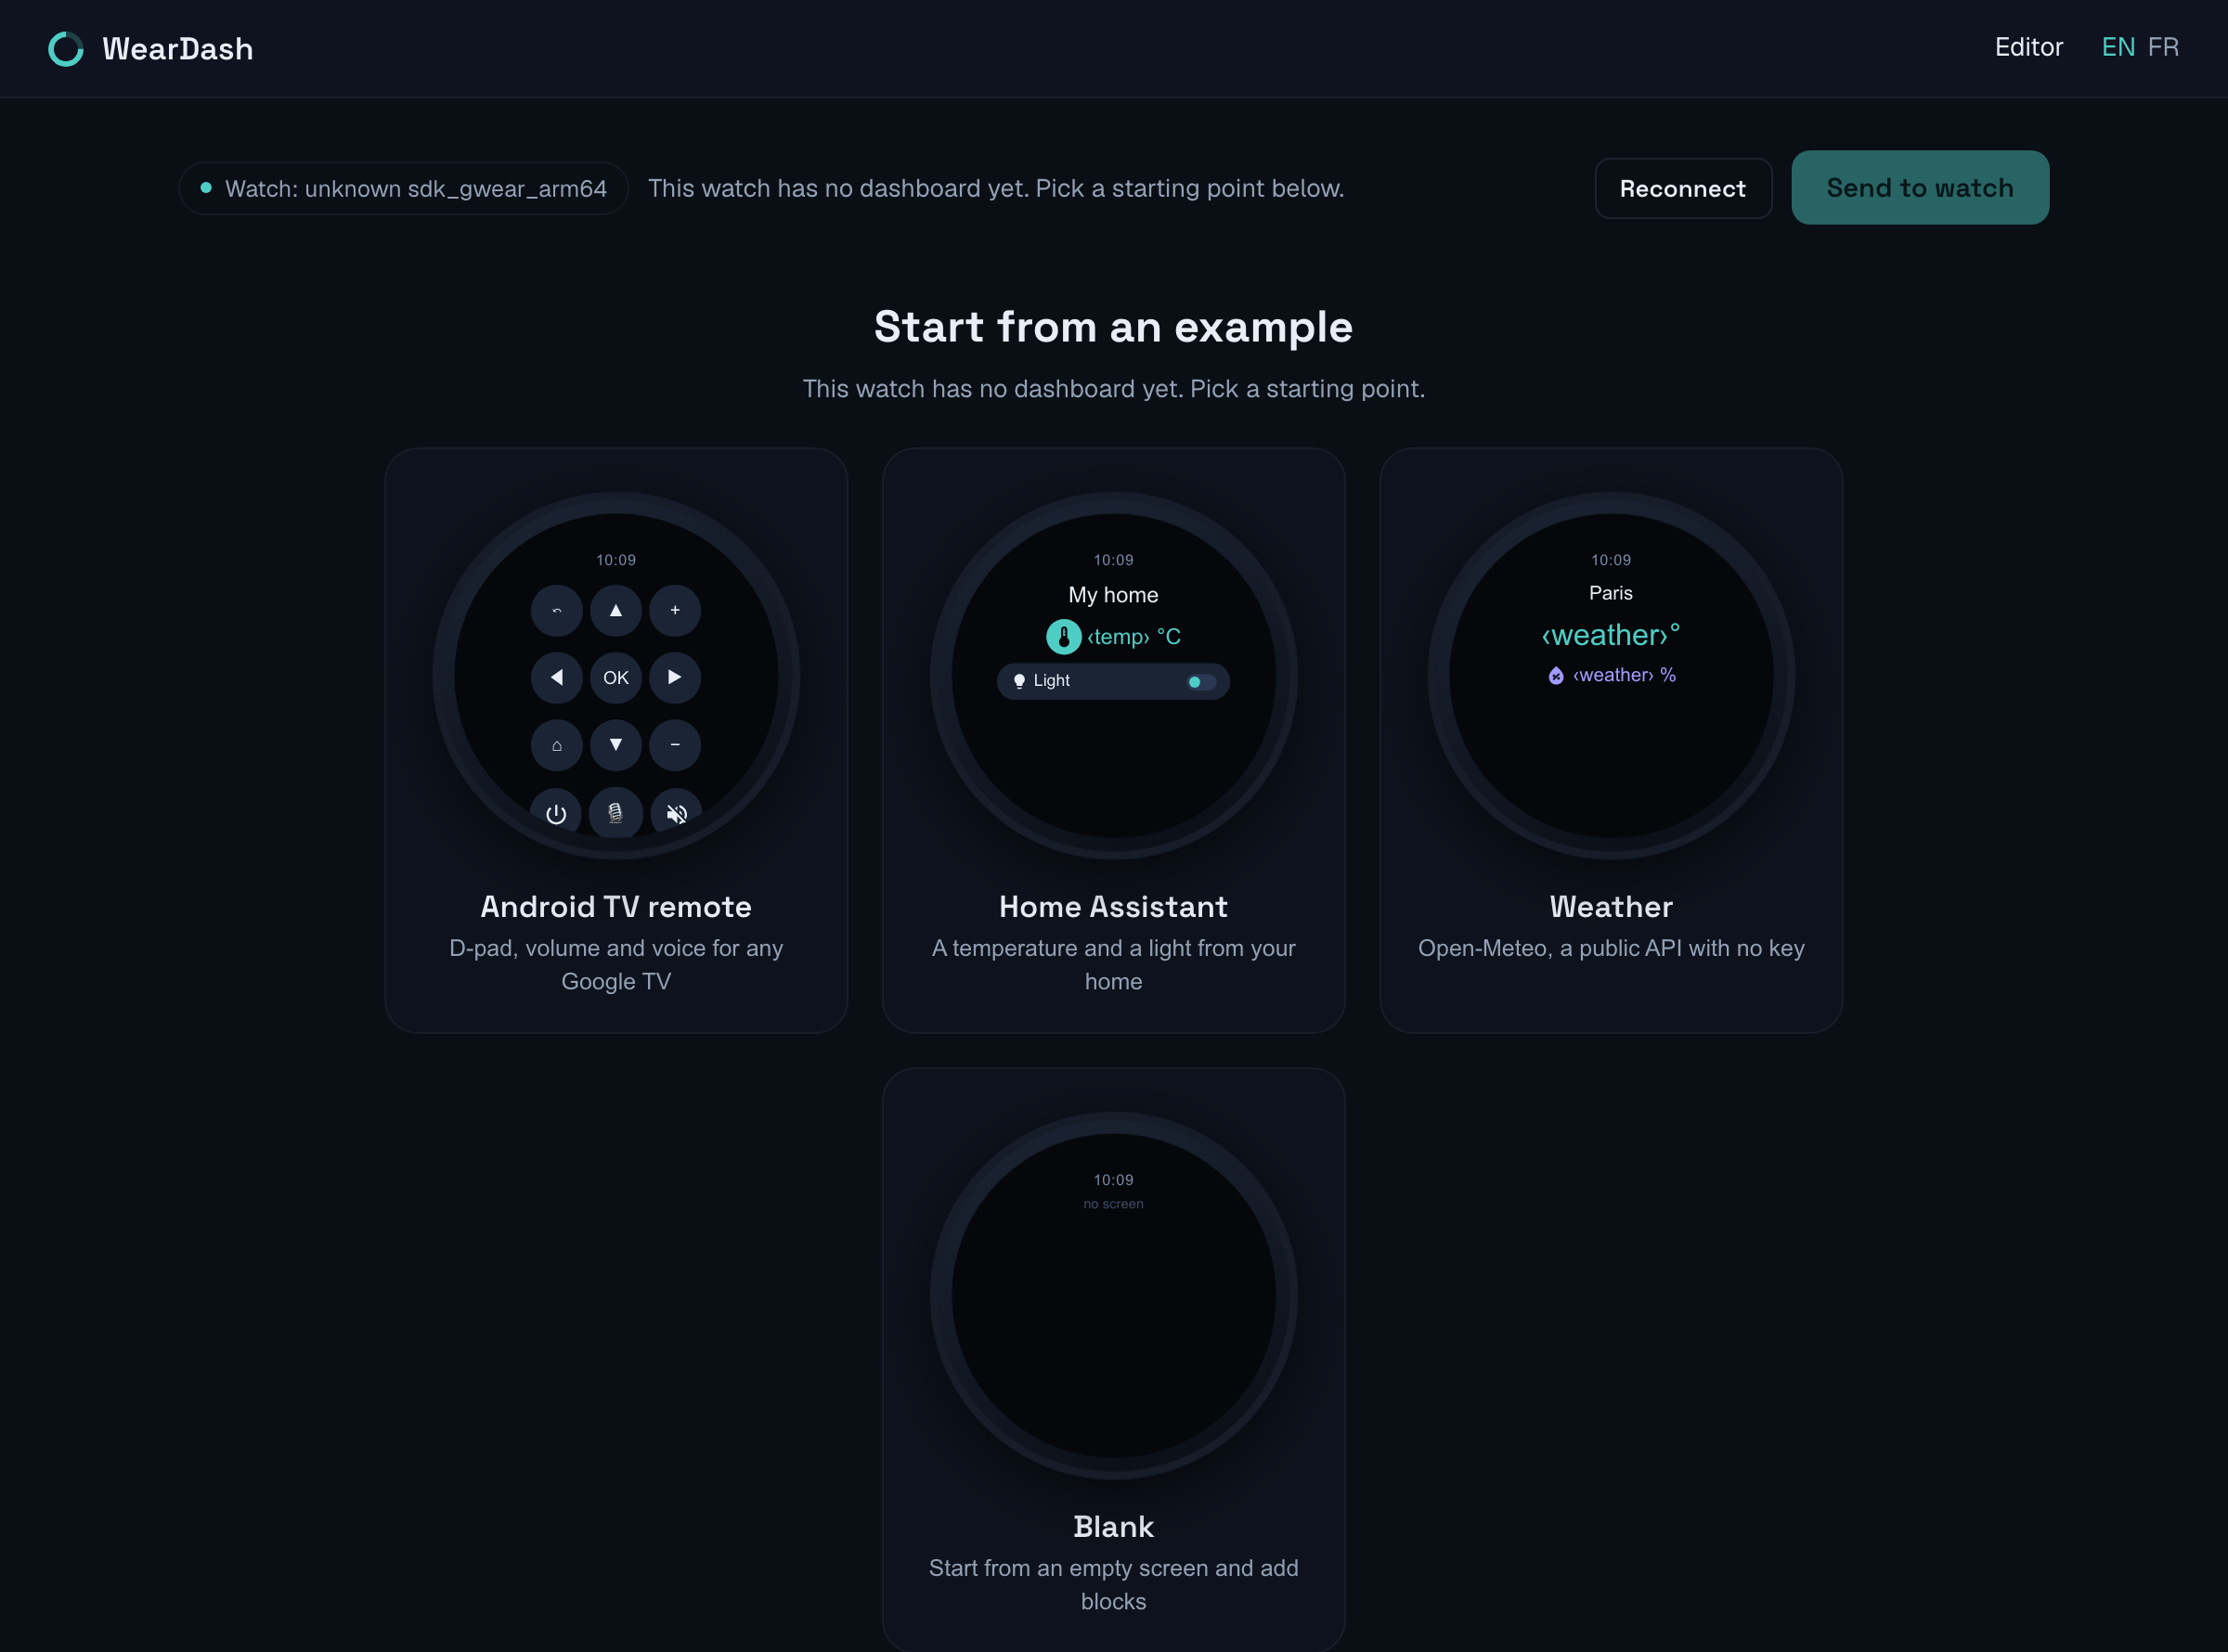
A blank watch offers four ready-made configs: Android TV remote, Home Assistant, weather, or an empty screen. Everything stays editable afterwards.
Send to the watch
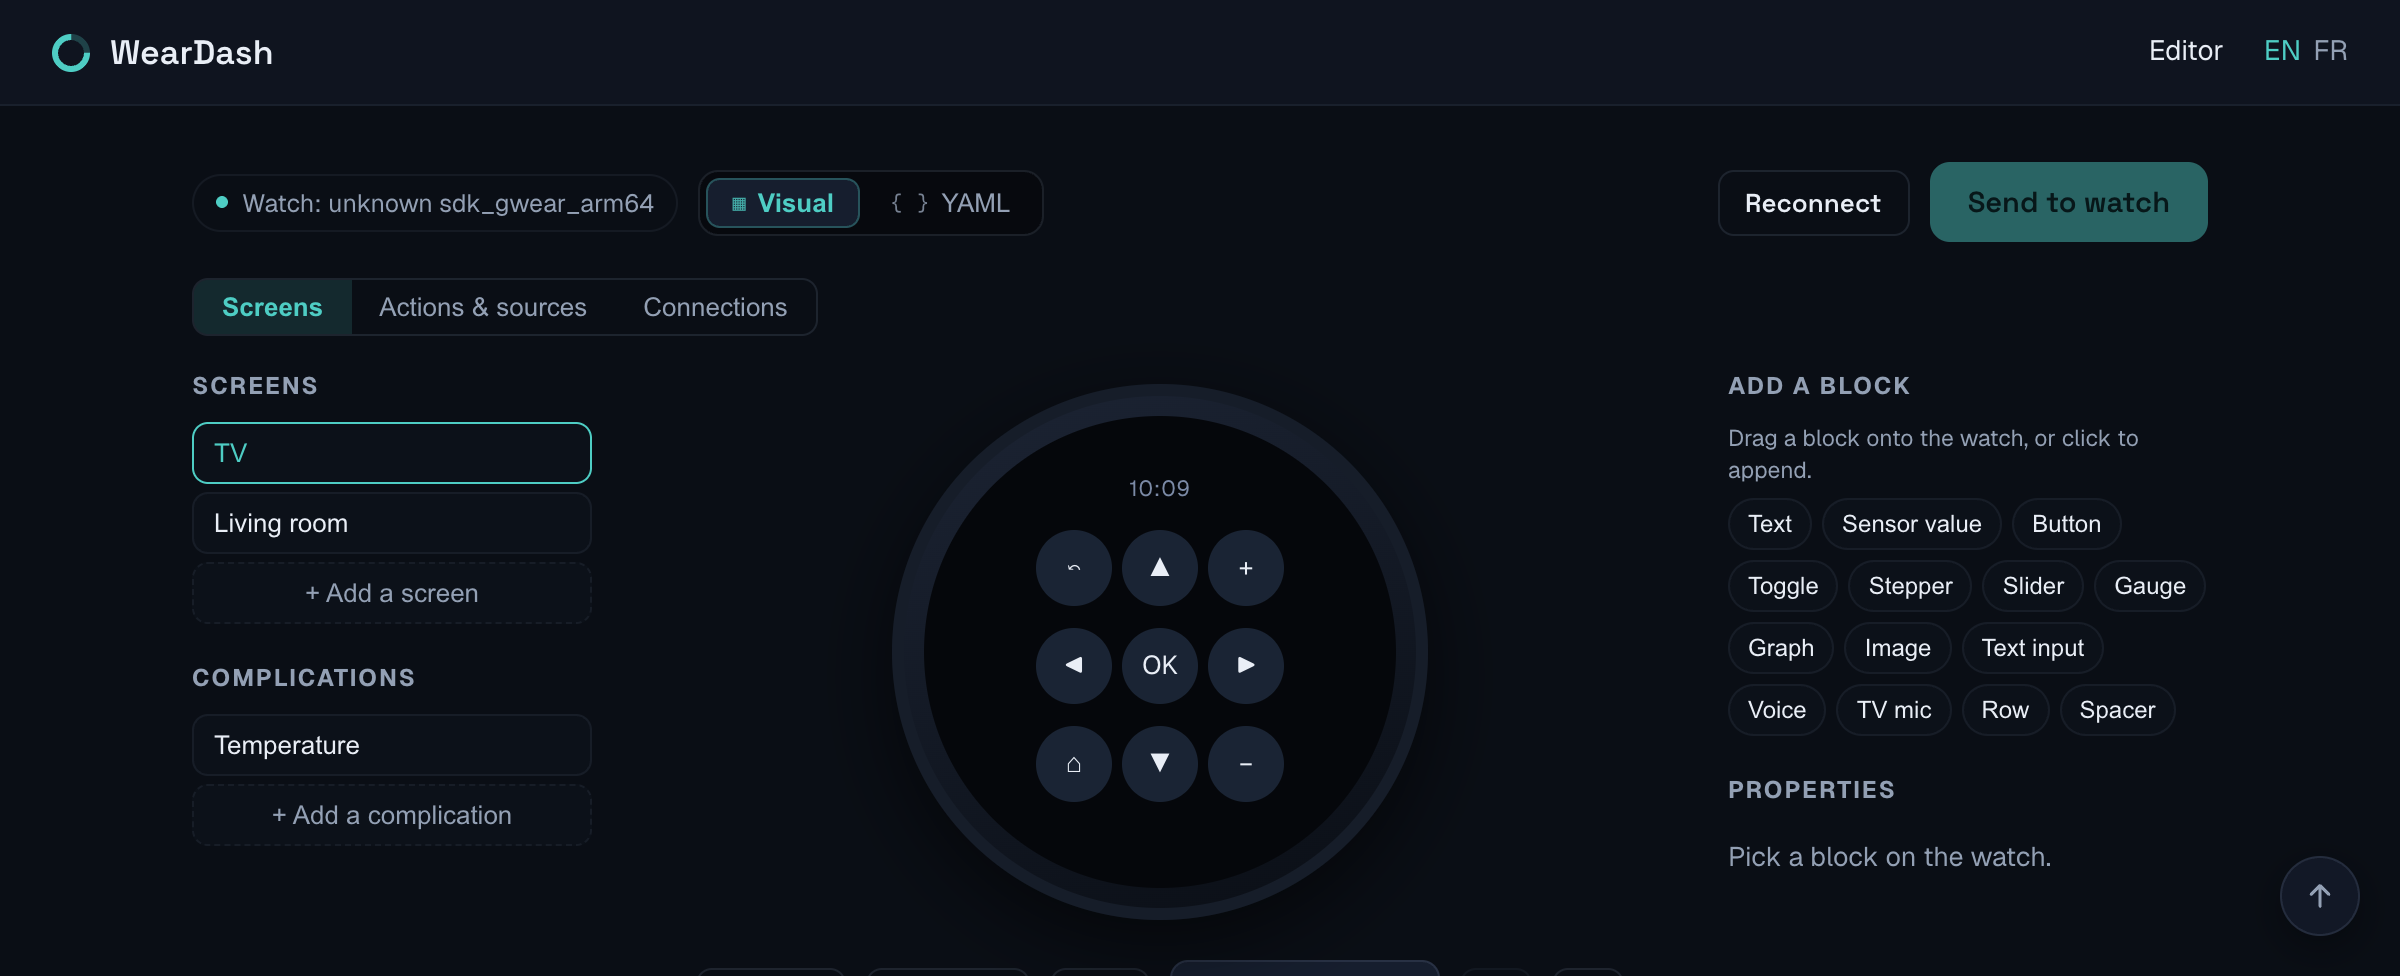
Press Send to watch. The watch applies the config and confirms; the session stays open, so you can keep editing and send again.
The pairing code expires after 30 minutes of inactivity. If a send fails with an expired session, read the new code on the watch and reconnect: your draft is kept.
Tutorial: a Home Assistant screen
This walks through a screen showing a live temperature and controlling a fan. Each step adds one block of YAML; you can paste them all into the code view, or do the same thing by clicking in the visual editor.
1. Declare the connector
A connector holds the address of a device or server. Home Assistant needs its URL and a long-lived access token.
connectors:
  ha:
    type: home_assistant
    url: "https://homeassistant.local:8123"
    token: ha_token      # name of a secret, not the token itself

  tv:
    type: atv            # address and pairing live on the watch

secrets: [ha_token]
The token field holds the NAME of a secret, not the token itself. The value is typed in the Secrets panel and sent encrypted.
2. Read a value
Sources are polled on a schedule and hold the data your screens display. An entity source goes through the Home Assistant connector; a url source reads any JSON endpoint.
sources: temp: entity: sensor.living_room_temperature refresh: 30 fan: entity: fan.living_room refresh: 30 weather: # any JSON endpoint works, connector or not url: "https://api.open-meteo.com/v1/forecast?latitude=48.85&longitude=2.35¤t=temperature_2m" refresh: 900
3. Declare an action
Actions are what buttons, toggles and sliders trigger. After an action runs, then_refresh re-reads the sources you name, so the screen catches up with the new state.
actions:
  fan_set:
    type: ha
    service: fan.set_percentage
    data: { entity_id: fan.living_room }
    then_refresh: [fan]

  fan_off:
    type: ha
    service: fan.turn_off
    data: { entity_id: fan.living_room }
    then_refresh: [fan]

  tv_ok:
    type: atv
    key: DPAD_CENTER

  webhook:
    url: "https://example.com/hook"
    method: POST
    body: { on: true }
4. Lay out the screen
A screen has an id, a label shown in the watch home list, and a root component. Containers nest: a column stacks its children, a row places them side by side.
screens:
  - id: living
    label: Living room
    root:
      type: column
      children:
        - { type: text, value: "{{ round(temp.state, 1) }}°", size: 24 }
        - { type: arc, value: "{{ fan.attributes.percentage }}", color: "#4ecdc4" }
        - type: slider
          value: "{{ fan.attributes.percentage }}"
          action: fan_set
          param: percentage
          min: 0
          max: 100
          step: 10
        - { type: button, label: "Off", action: fan_off }
5. Send and iterate
Press Send to watch. The screen appears in the watch home list. Keep the editor open: each send replaces the config on the watch, so you can adjust sizes and colors until it reads well on the wrist.
File structure
A config is a map of top-level keys. Only screens is needed to render something; everything else is optional.
version: 1

screens:
  - id: home
    label: Home
    root:
      type: column
      children:
        - { type: text, value: "Hello", size: 20 }
The top-level keys are version, title, vars, secrets, connectors, sources, actions, screens, tiles, complications and tls. Unknown keys are tolerated by the watch and reported as warnings by the editor.
Screen fields
| Field | Type | Required |
|---|---|---|
id | text | yes |
label | text | |
root | object | yes |
Use vars for values you repeat, such as a base URL. They are plain text substitutions, resolved before the request.
vars:
  ha: "https://homeassistant.local:8123"

connectors:
  ha:
    type: home_assistant
    url: "{{ vars.ha }}"
Components
Components are the blocks a screen is made of. Each one has a type and its own fields; text fields accept templates.
Every component also accepts a condition field, an expression that hides the block when it is false or fails: condition
column
Stacks its children vertically. The usual root of a screen.
| Field | Type | Required |
|---|---|---|
children | components |
row
Places its children side by side, useful for button grids.
| Field | Type | Required |
|---|---|---|
children | components |
box
Stacks its children on top of each other, for overlays.
| Field | Type | Required |
|---|---|---|
children | components |
text
A line of text. The value is templated, so it can show live data.
| Field | Type | Required |
|---|---|---|
value | text | |
size | number | |
color | text | |
icon | text | |
icon_color | text | |
icon_bg | text |
spacer
Empty space, to separate blocks.
| Field | Type | Required |
|---|---|---|
width | number | |
height | number |
button
Runs an action on tap. With long_action, holding it runs a second action.
| Field | Type | Required |
|---|---|---|
label | text | |
action | text | |
long_action | text | |
color | text | |
size | number | |
icon | text | |
icon_color | text | |
icon_bg | text |
arc
A circular gauge, from 0 to max, for a percentage or a level.
| Field | Type | Required |
|---|---|---|
value | text | yes |
max | text | |
color | text | |
thickness | number |
image
An image fetched from a URL, refreshed on a schedule. Tapping it reloads.
| Field | Type | Required |
|---|---|---|
url | text | |
headers | map of text | |
height | number | |
width | number | |
refresh | number |
slider
Sets a value by dragging. Sends the value as the action parameter.
| Field | Type | Required |
|---|---|---|
source | text | |
value | text | |
min | number | |
max | number | |
step | number | |
action | text | |
param | text |
graph
A curve drawn from a history source, such as a Home Assistant history endpoint.
| Field | Type | Required |
|---|---|---|
source | text | yes |
path | text | |
height | number | |
color | text |
mic
A microphone button that opens a voice search on Android TV.
| Field | Type | Required |
|---|---|---|
connector | text | |
size | number |
toggle
An on and off switch whose state is read from a source.
| Field | Type | Required |
|---|---|---|
label | text | |
value | text | |
on | text | |
action | text | |
icon | text | |
icon_color | text | |
icon_bg | text |
stepper
Adjusts a value with minus and plus buttons, more precise than a slider.
| Field | Type | Required |
|---|---|---|
label | text | |
value | text | |
min | number | |
max | number | |
step | number | |
action | text | |
param | text | |
unit | text |
input
Opens the watch keyboard or dictation and sends the text as the action parameter.
| Field | Type | Required |
|---|---|---|
label | text | |
action | text | |
param | text | |
icon | text | |
icon_color | text | |
icon_bg | text |
voice
Records audio. In transcript mode it uses speech recognition; in raw mode it posts a WAV file to the action URL.
| Field | Type | Required |
|---|---|---|
label | text | |
mode | text | |
action | text | |
param | text | |
icon | text | |
icon_color | text | |
icon_bg | text | |
size | number | |
max_duration | number | |
confirm | text |
Voice modes: transcript, raw
Sources
A source is data the watch reads on a schedule. Give it a name, and blocks reference that name in their expressions.
sources: temp: entity: sensor.living_room_temperature refresh: 30 fan: entity: fan.living_room refresh: 30 weather: # any JSON endpoint works, connector or not url: "https://api.open-meteo.com/v1/forecast?latitude=48.85&longitude=2.35¤t=temperature_2m" refresh: 900
| Field | Type | Required |
|---|---|---|
url | text | |
headers | map of text | |
refresh | number | |
entity | text | |
connector | text | |
method | text | |
body | object | |
extract | map of text |
Refresh is in seconds. A source is only polled while a screen or tile that uses it is visible, so a short refresh does not drain the battery in the background.
Monitoring a service
A source carries more than the JSON it read. Every request also reports how it went, under req followed by the source name — req.blog for the one below. ok tells whether the code was a 2xx, status_code the code itself, latency_ms the round trip in milliseconds, and body the raw response. That is enough to build a status screen without anything to parse.
| Field | What it holds |
|---|---|
req.<source>.ok | true when the response code was a 2xx. False for anything else, including an unreachable host. |
req.<source>.status_code | The HTTP code, 200, 404, 503… and 0 when the request never got an answer at all. |
req.<source>.latency_ms | Round trip in milliseconds, request sent to response received. Zero before the first measurement — that is what keeps a dot gray rather than red at startup. |
req.<source>.body | The raw response, whatever its content type. Up to 256 KB. This is what contains searches. |
sources:
  blog:                   # nothing to parse: only the response matters
    url: "https://example.com"
    refresh: 60

screens:
  - id: status
    label: Status
    root:
      type: column
      children:
        - type: row
          children:
            # Grey until the first measurement, then green or red. No
            # measurement means no latency, so the comparison is false.
            - type: text
              value: "●"
              color: "{{ req.blog.latency_ms > 0 ? (req.blog.ok ? '#4ecdc4' : '#e5726b') : '#55627a' }}"
            - { type: text, value: "blog" }
            - { type: text, value: "{{ req.blog.latency_ms }} ms", size: 12 }
        - type: text
          value: "needs a new token"
          condition: "req.blog.status_code == 401"
A non-2xx code and an unreachable host are both measurements, not failures: the source keeps its last known JSON, and the probe reports the truth. That is why a service that is down shows red rather than gray — and why the dot stays gray before the first measurement, when there is no latency yet and the comparison is simply false. Copy that pattern; it gives you “still testing” for free.
contains checks for a keyword in a string, ignoring case — the usual way to watch a plain-text /health or a page that says “in stock”. == and != trim both sides first, so an endpoint answering “OK” followed by a newline still equals 'OK'.
Reading something that is not JSON
extract pulls values out of a raw body with regular expressions: group 1 when the pattern has one, otherwise the whole match. A key whose pattern matches nothing is simply absent. When extract is present it replaces the JSON parse entirely — the source produces exactly the keys you named, whatever the server sends as Content-Type.
sources:
  metrics:
    url: "https://box.example.com/metrics"
    refresh: 60
    # Not JSON: each pattern pulls one value out of the raw body.
    # Group 1 when there is one, otherwise the whole match.
    # `(?:^|\n)` anchors on a line start without needing a regex flag.
    extract:
      load: '(?:^|\n)node_load1(?:\{[^}]*\})? ([0-9.eE+-]+)'

  health:
    url: "https://box.example.com/health"    # answers "OK" in plain text
    refresh: 30
The watch runs Java regular expressions, so inline flags like (?m) work there. Writing the anchor as (?:^|\n) keeps the same pattern readable by the editor, which checks it in JavaScript.
A body is read up to 256 KB. Beyond that, contains and extract only see the beginning of the document. It is a cap on what gets loaded, not a truncation after the fact: a monitored web page never costs more than that in memory.
Reading an API that needs POST
A source can set method and body, for read APIs that only answer to POST. The body is sent as JSON unless you declare a Content-Type header yourself: with any other type, a string body goes out exactly as written, so body with the text a=1&b=2 arrives as a=1&b=2 rather than quoted.
The watch probes from where it is. A service only reachable on your LAN will show red over mobile data — that is not a defect to fix but the flip side of what centralized probes cannot see: whether the service actually answers you, from where you are.
Actions
An action is what a block triggers. Name it once, and any number of blocks can call it.
actions:
  fan_set:
    type: ha
    service: fan.set_percentage
    data: { entity_id: fan.living_room }
    then_refresh: [fan]

  fan_off:
    type: ha
    service: fan.turn_off
    data: { entity_id: fan.living_room }
    then_refresh: [fan]

  tv_ok:
    type: atv
    key: DPAD_CENTER

  webhook:
    url: "https://example.com/hook"
    method: POST
    body: { on: true }
type: http
Any HTTP request. This is the default when no type is given.
| Field | Type | Required |
|---|---|---|
method | text | |
url | text | yes |
headers | map of text | |
body | object | |
then_refresh | list of names |
type: atv
An Android TV remote key, or a link that opens an app on the TV.
| Field | Type | Required |
|---|---|---|
connector | text | |
key | text | |
app_link | text | |
then_refresh | list of names |
type: ha
A Home Assistant service call, sent through the connector.
| Field | Type | Required |
|---|---|---|
connector | text | |
service | text | yes |
data | object | |
then_refresh | list of names |
The response of an action is not available to your templates. To show the result, name the sources to re-read in then_refresh and display those instead.
Connectors
Connectors hold the address and credentials of a device or server, so sources and actions stay short. Android TV connectors are paired on the watch itself, under Settings, since pairing exchanges a certificate.
connectors:
  ha:
    type: home_assistant
    url: "https://homeassistant.local:8123"
    token: ha_token      # name of a secret, not the token itself

  tv:
    type: atv            # address and pairing live on the watch

secrets: [ha_token]
| Field | Type | Required |
|---|---|---|
type | text | yes |
url | text | |
token | text |
The token field takes the name of a secret, not the token value. Writing the template form directly also works, but a bare token in the config would be stored in clear text.
Connector types: atv, home_assistant
Templates and conditions
Any text field can contain expressions between double braces. A condition field is an expression on its own, without braces. Paths walk the JSON returned by a source, so temp.state is the state field of the source named temp.
# A value from a source
value: "{{ temp.state }}"

# Rounded, with a suffix
value: "{{ round(temp.state, 1) }}°C"

# Shown only when the CO2 level is high
condition: "co2.state > 1500"

# Colored by state
color: "{{ fan.state == 'on' ? '#4ecdc4' : '#93a0b4' }}"

# Hidden on tiles (tiles do not scroll)
condition: "!is_tile"
Operators
? :||&&== !=contains< <= > >=+ -* /!
Functions
round(value)round(value, decimals)
round is the only function. With two arguments, the second is the number of decimals.
Built-in roots
varssecretsis_tilereq
Besides your source names, expressions can read vars for your own variables, secrets for values stored on the watch, and is_tile, which is true when the block is being rendered as a tile.
Reaching a value
A path walks the JSON with dots and brackets: temp.state, list[0].name. A key that is not a plain identifier — one that starts with a digit, or contains a dash, a dot or a space — is only reachable in quotes: heartbeatList['123']. Brackets also count from the end, so list[-1] is the most recent entry of a history whose length you do not know.
An expression that fails renders as an en dash. If a screen shows dashes everywhere, the source name or the path is usually wrong: check the source in Actions and sources, and use its Test button.
Tiles
Tiles are the panels one swipe away from the watch face. A tile can mirror an existing screen, or define its own root when the screen is too dense for a tile.
tiles:
  # A tile mirroring an existing screen
  - id: living
    label: Living room
    screen: living

  # A tile with its own layout
  - id: quick
    label: Quick
    root:
      type: column
      children:
        - { type: text, value: "{{ temp.state }}°" }
| Field | Type | Required |
|---|---|---|
id | text | yes |
label | text | |
root | object | |
screen | text |
Tiles do not scroll and have no long press, so long_action is ignored there. Use a condition on is_tile to hide the blocks that do not fit, or the Show on control in the editor.
On Apple Watch a tile becomes a Smart Stack widget: a header plus at most two rows of text or gauges. Buttons, images, graphs and sliders are dropped, toggles freeze into plain text, and tapping anywhere opens the app on the tile’s screen. The watch maps 3 tile slots, assigned in the app’s settings. Switch the editor preview to Apple Watch to see exactly what survives.
Complications
Complications are the small fields on a watch face. Declare them here, then add a WearDash complication from your watch face and pick which one it shows in Settings.
complications:
  - id: temp
    label: Temperature
    type: short_text
    value: "{{ round(temp.state) }}°"
    screen: living   # tapping the complication opens this screen
| Field | Type | Required |
|---|---|---|
id | text | yes |
label | text | |
type | text | |
value | text | |
title | text | |
icon | text | |
screen | text | |
min | number | |
max | number |
A complication cannot hide itself — the watch face keeps its slot whatever happens — so its icon is the only state signal it has. The icon field takes an expression like any other, so it can name one picture when the service answers and another when it does not.
Complication types: short_text, ranged_value, monochromatic_image
On Apple Watch a complication is drawn in four shapes — circular, corner, inline, rectangular — and the watch face picks one. Only short_text and ranged_value exist there: monochromatic_image falls back to short text, and colors are not applied. The watch maps 3 complication slots, assigned in the app’s settings.
Secrets
Declare the names your config uses; the values live only on the watch. Reference a secret in any text field, typically in an Authorization header.
secrets: [ha_token, api_key]

sources:
  api:
    url: "https://example.com/data.json"
    headers:
      Authorization: "Bearer {{ secrets.api_key }}"
In the editor, the Secrets panel shows which names the watch already holds. Values are encrypted in your browser before they are sent, and are never written into the config.
Removing a name from secrets stops the editor asking for it, but does not erase the value already stored on the watch. Only “Clear all secrets”, in the watch settings, does.
Watch out for typographic characters when pasting a token. A dash copied from a document breaks the Authorization header before the request is even sent; the editor warns before sending.
Custom certificates
Wear OS gives no way to install a certificate authority system-wide, so WearDash handles TLS per host. Paste a CA to trust a private authority, or name a secret holding a client certificate for mutual TLS.
tls:
  homeassistant.local:
    ca: |
      -----BEGIN CERTIFICATE-----
      MIIB...
      -----END CERTIFICATE-----

  api.example.com:
    client_p12: api_p12   # name of a secret holding the .p12, base64
| Field | Type | Required |
|---|---|---|
ca | text | |
client_p12 | text |
Without any tls entry, an unknown certificate triggers a prompt on the watch showing its fingerprint, which you accept once. A client certificate is imported into the watch keystore and its passphrase is typed on the watch.
Troubleshooting
- Every value shows as a dash
- That is the placeholder for a failed expression. The source name or the JSON path is wrong, the source has no data yet, or a secret it needs is not set on the watch. Open the source in Actions and sources and press Test.
- The watch shows a config error
- The config could not be parsed or a required field is missing. The editor reports the same errors with line numbers before sending, so reopen the config in the editor and fix what is flagged in red.
- No confirmation after sending
- The watch confirms once it has applied the config. Without a confirmation, the app was likely killed in the background: open WearDash on the watch, then send again with the code it shows.
- A tile is cut off
- Tiles do not scroll. Hide the blocks that do not fit with the Show on control, which writes a condition on is_tile, and check the result with the Tile view button.
- Android TV pairing fails
- Pairing runs on the watch, under Settings and Connectors. Enter the address or use the scan, then type the six characters shown on the TV. If the device was paired by another client with the same name, forget the pairing and start again.
- A server rejects the watch
- A server that requires a client certificate closes the connection before any response. Add a tls entry for that host with client_p12, upload the .p12 in the Secrets panel, and type its passphrase when the watch asks.
The config format is also published as a JSON Schema, usable in your editor: weardash-config.schema.json · Privacy